Heating Systems

 Steam Radiators

Styles

Steamview

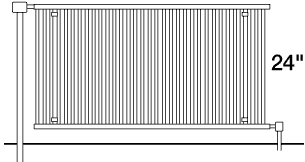
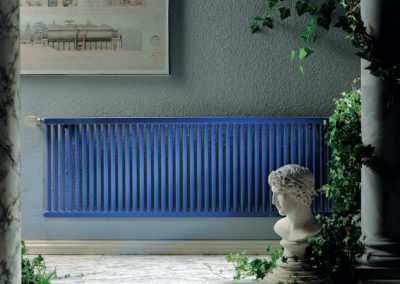
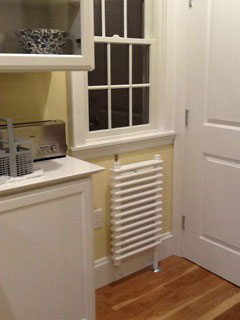
The Steamview is made for both one pipe and two pipe steam systems. The all-welded steel construction ensures a long service life.

Sleek 2.5″ profile. Available in two heights (16″ and 24″) and five lengths (24″, 36″, 48″, 60″, and 72″)

Charleston Pro

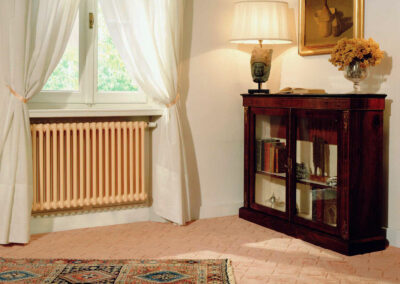
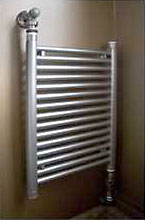
The Charleston Pro is made for both one pipe and two pipe steam systems. The all-welded steel construction ensures a long service life.

Sleek 4″ profile. Available in two heights (16″ and 24″) and five lengths (24″, 36″, 48″, 60″, and 72″)

Steam Flow Form

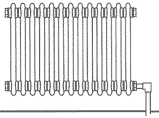
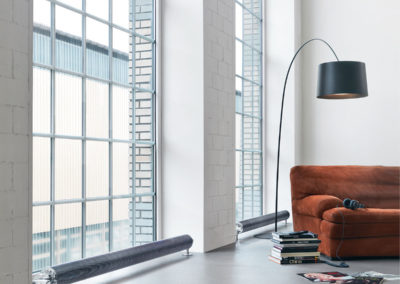
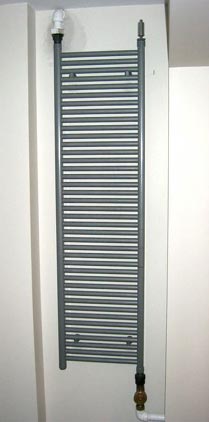
 The sleek and functional design of the Steam Flow Form presents the nostalgic charm of early industrial design as well as providing a dramatic twist to modern design. It is ideal for use in lofts, studios and galleries, or rooms where a deliberate design statement is to be made. Fins arranged in a spiral around the heating tube radiate heat efficiently throughout the room in a highly pleasing way. The Steam Flow Form is for two-pipe steam systems only.

The stylish alternative to bulky cast iron steam radiators

Style

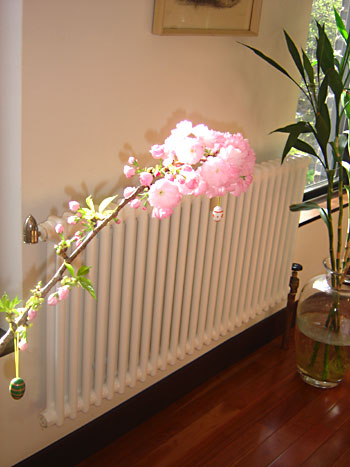
These sleek designs allow you to free up valuable space. The Steamview and Charleston Pro are available in over a hundred colors.

Immediate Delivery

Available for immediate delivery in stock colors.

Simple Installation

The Steamview and Charleston Pro are made for both one and two pipe steam heating systems, are wall mounted and offer continuous mounting.  The Steam Flow Form is easily floor mounted.  All Steam Radiators can be piped with the supply or return on either side of the radiator.

Durability

The Steam Radiators’ all welded steel construction ensures a long service life. Proprietary internal construction guards against corrosion. All Steam Radiators have a five- year limited warranty.

Steamview

Specifications
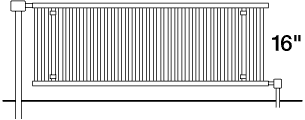
16 inch steam radiator

16″ STEAMVIEW CAPACITIES

Nominal Length
24″
36″
48″
60″
72″
BTU/H OUTPUT 2,564 3,763 5,104 6,306 7,646
steam radiator

STEAMVIEW CAPACITIES

Nominal Length
24″
36″
48″
60″
72″
BTU/H OUTPUT 3,553 5,225 7,106 8,778 10,659

Installation Tips

ROUGHING-IN

electric omnipanel
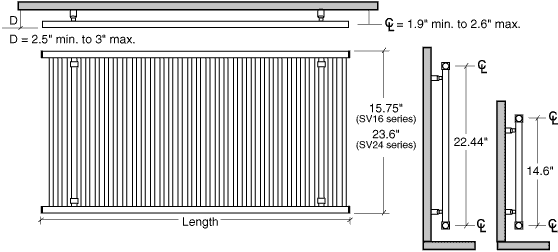
16″ MODEL SV16-24 SV16-36 SV16-48 SV16-60 SV16-72
Nominal
Length
24″ 36″ 48″ 60″ 72″
LENGTH
(IN.)
23.34″ 34.68″ 47.44″ 58.78″ 71.53″
WEIGHT
(LBS)
10 lbs 15 lbs 22 lbs 27 lbs 33 lbs


24″ MODEL SV24-24 SV24-36 SV24-48 SV24-60 SV24-72
Nominal
Length
24″ 36″ 48″ 60″ 72″
LENGTH
(IN.)
23.34″ 34.68″ 47.44″ 58.78″ 71.53″
WEIGHT
(LBS)
14 lbs 21 lbs 30 lbs 37 lbs 46 lbs


MOUNTING

picture

Mounting Tips:

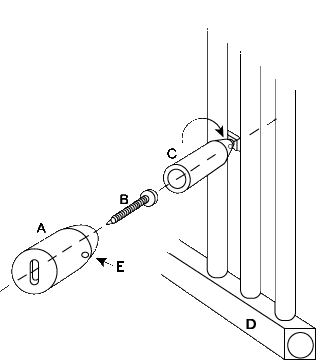
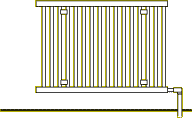
  1. Lay out the desired position of the radiator on the wall. Determine the locations of solid wall members (wall studs, bracing, etc.). Mark the positions for the mounting brackets, noting that each bracket should fit in the center of the space between adjacent radiator tubes. Note: All of the brackets supplied with the radiator should be used, half as top supports and half as bottom supports.
  2. Attach all of the bracket sleeves (A) to solid wall members, using the appropriate mounting fastener (B) (by others)
  3. Position mounting bracket cylinders (C) between adjacent radiator (D) tubes, so that the cylinders (C) will line up with the bracket sleeves (A), mounted on the wall.
  4. Rotate cylinder (C) to tighten and clamp the cylinder’s end piece between the radiator’s tubes.
  5. Slide the cylinders (C) into the mounting sleeves (A), making final adjustments by loosening cylinder (C), sliding it into final alignment, and re-tightening it. Secure cylinder (C) to sleeve (A) by tightening up allen head screw (E). Note: The radiator should tilt towards the condensate return at a rate of 1/16” per foot of radiator length.


PIPING

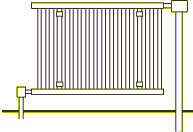
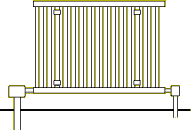
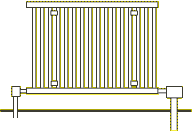
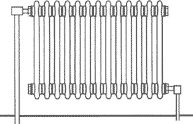
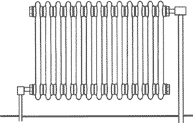
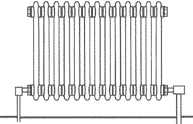
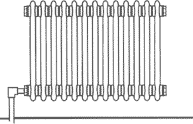
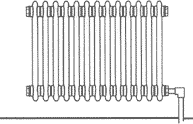
2-PIPE STEAM SYSTEM

PREFERRED

ALTERNATE

picture
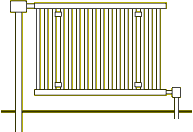
Left Hand Steam Supplypicture
Right Hand Steam Supply
picture
Left Hand Steam Supplypicture
Right Hand Steam Supply

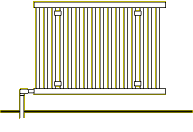
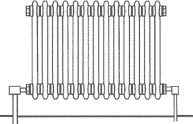
1-PIPE STEAM SYSTEM

PREFERRED

picture
Left Hand Steam Supplypicture
Right Hand Steam Supply


GENERAL INSTALLATION TIPS

2-Pipe Steam System

  1. A 1″ NPT tapping is included on each corner of the radiator.
    Two 1″ plugs are provided to plug the two unused radiator tappings.
    Use a 5/8″ allen wrench to tighten these plugs. A third plug with a 1/8″ vent tapping is also included.
    Pipe dope should be applied to the plugs.
  2. The installer should supply and install the proper size reducing bushing.
  3. The mounting brackets must be secured to a load-bearing wall member (like a wall stud or solid backing) capable of handling the radiator’s weight.
  4. The radiator should be tilted a minimum of 1/16” per foot toward the condensate return.

1-Pipe Steam System

  1. A 1″ NPT tapping is included on each corner of the radiator.
    Two 1″ plugs are provided to plug the two unused radiator tappings.
    Use a 5/8″ allen wrench to tighten these plugs. A third plug with a 1/8″ vent tapping is also included.
    Pipe dope should be applied to the plugs.
  2. The installer should supply and install the proper one pipe steam air vent or control valve in the 1/8″ vent tapping.
  3. The mounting brackets must be secured to a load-bearing wall member (like a wall stud or solid backing) capable of handling the radiator’s weight.
  4. The radiator should be tilted a minimum of 1/16” per foot toward the condensate return.

Downloads

Downloads

Charleston Pro

Specifications

16 inch steam radiator

16″ CHARLESTON   PRO   CAPACITIES

Nominal Length
24″
36″
48″
60″
72″
BTU/H OUTPUT 2,990 4,370 5,980 7,590 8,970
steam radiator

24″ CHARLESTON   PRO   CAPACITIES

Nominal Length
24″
36″
48″
60″
72″
BTU/H OUTPUT 4,654 6,820 9,308 11,814 13,962

Installation Tips

ROUGHING-IN

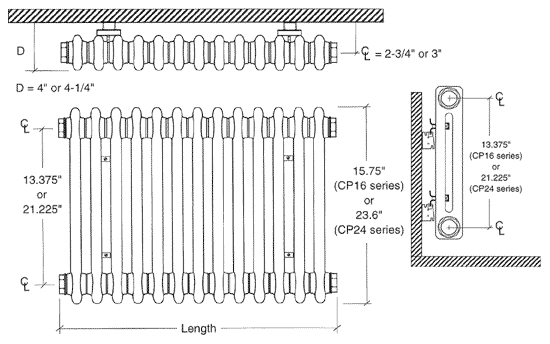
Charleston Steam Radiator Dimensions
16″ MODEL CP16-24 CP16-36 CP16-48 CP16-60 CP16-72
Nominal
Length
24″ 36″ 48″ 60″ 72″
LENGTH
(IN.)
25.1″ 35.98″ 48.66″ 61.34″ 72.2″
WEIGHT
(LBS)
21 lbs 30.3 lbs 40.5 lbs 51.3 lbs 60.5 lbs


24″ MODEL CP24-24 CP24-36 CP24-48 CP24-60 CP24-72
Nominal
Length
24″ 36″ 48″ 60″ 72″
LENGTH
(IN.)
25.1″ 35.98″ 48.66″ 61.34″ 72.2″
WEIGHT
(LBS)
29.2 lbs 42.4 lbs 57.8 lbs 73.2 lbs 86.4 lbs


MOUNTING

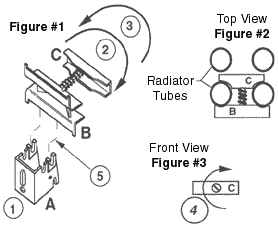
picture Mounting Tips:

  1. Lay out the desired position of the radiator on the wall. Determine the locations of solid wall members (wall studs, bracing, etc.). Mark the positions for the wall mounting brackets (A), noting that each bracket should fit in the center of the space between adjacent radiator tubes. Fasten all part A wall brackets securely to the wall using appropriate mounting fasteners (by others). Note: All of the brackets supplied should be used, half as top supports and half as bottom supports.
  2. Rotate part C at a 90° angle to part B, and insert part C between two adjacent rear tubes of the radiator so that the bracket assembly B-C will line up with it’s corresponding slot on part A.
  3. Rotate part C back 90° in the opposite direction, so that the bracket assembly B-C “captures” the two adjacent rear tubes of the radiator (see Figure #2).
  4. Tighten the screw on part C (see Figure #3), so that the bracket assembly B-C tightly clamps the radiator’s rear tubes. Repeat steps 2, 3, and 4 for all remaining bracket assemblies.
  5. Mount the radiator to the wall by placing parts B into the mounting slots of Parts A, Check to make sure that the radiator tilts at least 1/16″ per foot towards the condensate return. If necessary, loosen all parts C slightly and adjust the radiator to get the proper radiator tilt.


PIPING

2-PIPE STEAM SYSTEM

PREFERRED

ALTERNATE

picture
Left Hand Steam Supplypicture
Right Hand Steam Supply

Left Hand Steam Supply
Right Hand Steam Supply
1-PIPE STEAM SYSTEM

PREFERRED

picture
Left Hand Steam Supplypicture
Right Hand Steam Supply


GENERAL INSTALLATION TIPS

2-Pipe Steam System

  1. A 1″ NPT tapping is included on each corner of the radiator. Two 1″ plugs are provided to plug the two unused radiator tappings. Use a 5/8″ allen wrench to tighten these plugs. A third plug with a 1/8″ vent tapping is also included. Pipe dope should be applied to the plugs.
  2. The installer should supply and install the proper size reducing bushing for the steam trap to be used.
  3. The mounting brackets must be secured to a load-bearing wall member (like a wall stud or solid backing) capable of handling the radiator’s weight.
  4. The radiator should be tilted a minimum of 1/16″ per foot toward the condensate return.
1-Pipe Steam System

  1. A 1″ NPT tapping is included on each corner of the radiator. Two 1″ plugs are provided to plug the two unused radiator tappings. Use a 5/8″ allen wrench to tighten these plugs. A third plug with a 1/8″ vent tapping is also included. Pipe dope should be applied to the plugs.
  2. The installer should supply and install the proper one pipe steam air vent or control valve in the 1/8″ vent tapping.
  3. The mounting brackets must be secured to a load-bearing wall member (like a wall stud or solid backing) capable of handling the radiator’s weight.
  4. The radiator should be tilted a minimum of 1/16″ per foot toward the condensate return.

Downloads

Downloads

Steam Flow Form

Specifications

16 inch steam radiator

STEAM  FLOW FORM CAPACITIES

Length
36 “
72 “
BTU/H OUTPUT 3,000 6,250

Installation Tips

ROUGHING-IN

Charleston Steam Radiator Dimensions
7.65″ MODEL XSFF91.44 XSFF182.88
LENGTH (IN.) 36″ 72″
WEIGHT (LBS) 32 lbs 57 lbs


MOUNTING

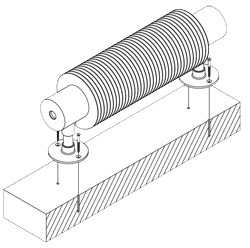
picture Mounting Tips:

  1. This radiator may only be installed horizontally and affixed to the floor as shown with two screws in each pedestal.
  2. The radiator may be rotated depending on which sides the supply and return are desired.
  3. The radiator should be tilted a minimum of 1/16″ per foot toward the condensate return. This can be accomplished by turning the center tube from the bottom of the radiator as well as the pedestal base to adjust the pedestals.
  4. Accurately mark the holes to mount the pedestal bases as shown under Specifications.
  5. Drill holes to suit screws
  6. Fix radiator to the floor with screws.
  7. A control valve should be installed on the supply side and a steam trap on the return side. Use pipe dope to seal connections.

Design & Color Options

With a vibrant and varied palette, you can choose a shade that will blend into the background or add an eye-catching focal point to your room. Whether you’re decorating a neutral space, or you’re eager to inject character and color, there’s an ideal match for you.

You can choose from a range of standard colors or pay a little extra for a custom shade for your home. For custom color options please visit our Design Assistance and Custom Products Section where our team can help you find the exact match you are looking for.
View Color Options

Design & Planning

Runtal heating products can blend into a traditional décor, highlight an ultra-modern design, or accent any style in between. From baseboard style, to wall panels, to fancy curves and dramatic room dividers, Runtal manufactures the perfect welded steel radiator for every application. Since Runtal manufactures an almost unlimited selection of sizes, colors, and heat outputs. Runtal is truly a designer’s dream. Innovation in architectural detail is no longer held hostage to “old rules” of mechanical heating systems. Imagine the possibilities, confident that the final design will be comfortable and stylish.

Store

Purchase any of our handcrafted stocked Runtal White radiators directly from the factory, for quick delivery, or choose from a variety of 9 standard colors for 2-week delivery.

Design Assistance & Custom Products

Runtal Radiators can be custom designed to fit your exact specifications. Choose from an endless variety of colors, including select metallic finishes. Our experts will assist you with finding the exact size, heat capacity and décor your are looking for.